




Last Updated: 4 November 2026
Quick Summary
To troubleshoot classroom robotics, work through a fixed sequence: check power and charging first, then Bluetooth pairing, motors, sensors, wiring, maintenance and safety. Always rule out hardware with a known-good program before rewriting code, because most faults follow a predictable pattern.
- Test a fault with a known-good program: if it still fails, the problem is hardware.
- Keep the robot within a metre of the device during Bluetooth pairing.
- A humming motor is stuck, while a silent one has no power.
- Run the maintenance checklist at the end of each term and before big projects.
- Power down before checking wiring and never force a connector.
Table of Contents
- Why a Methodical Troubleshooting Workflow Beats Guesswork
- Step 1: Check Power Supply, Batteries and Charging
- Step 2: Fix a Robotics Kit Not Connecting to Bluetooth
- Step 3: When a Robotics Motor Is Not Working
- Step 4: Robotics Sensor Troubleshooting for Inconsistent Readings
- Step 5: Check Wiring and Component Connections
- Step 6: Your Robotics Hardware Maintenance Checklist
- Step 7: Safety Procedures and Running a Mid-Lesson Recovery
- Frequently Asked Questions
Why a Methodical Troubleshooting Workflow Beats Guesswork
A classroom robot that won't start mid-lesson creates instant chaos, which is why every teacher needs to troubleshoot classroom robotics calmly. According to the Australian Curriculum, Assessment and Reporting Authority's digital technologies guidance, hands-on digital systems work sits at the centre of the technologies learning area, which means a dead robot stalls real learning, not just a fun activity.
Teachers often face this exact moment. The good news: most faults follow a predictable pattern. You can review the robotics kit range you are using. Troubleshooting classroom robotics hardware is a skill you can learn in an afternoon, and it saves hours of lesson time.
The key is a fixed sequence. Check power first, then connection, then movement, then sensing. Work through the same order every time and you stop guessing.
Here is the workflow we recommend:
- Power and charging
- Bluetooth and device pairing
- Motors and movement
- Sensors and readings
- Wiring and connectors
- Maintenance and prevention
- Safety and recovery
Below, we show you exactly how to run each step so a lesson never grinds to a halt.
Separating Hardware Faults from Programming Errors
The first question in any fault is simple: is this the robot or the code? A hardware fault is a physical problem with power, wiring, motors or sensors. A software issue is a problem in the program itself.
Test it with a known-good program. Upload a simple routine that makes the robot drive forward. If it still fails, the fault is hardware. If it works, the fault is in your code.
A common mistake is rewriting code for twenty minutes when the real problem is a flat battery. Always rule out hardware first.
If you are unsure whether the fault sits in the hardware or the programming, lesson-plan guidance on programming the robots can help.
Step 1: Check Power Supply, Batteries and Charging
Start every diagnosis at the power supply. A robot that won't turn on, or dies after a few minutes, usually has a charging or battery problem, not a broken brain.
Run these checks in order:
- Confirm the power switch is fully on
- Check the battery is seated correctly in its compartment
- Look for corrosion or bent springs in the battery door
- Charge the robot for a full cycle before testing again
- Try a known-good battery from another robot
Many kits use rechargeable packs, and these lose capacity over time. If a battery no longer holds charge through a lesson, replace it rather than working around it.
For a class set, a charging dock keeps robots ready between lessons. The Edison EdCharger charges and stores up to five Edison V3 robots at once, so a class set is always ready to go.

Step 2: Fix a Robotics Kit Not Connecting to Bluetooth
When a robotics kit is not connecting to Bluetooth, the cause is usually pairing state, not a broken radio. Fix it by resetting the connection on both the robot and the device, then pairing again from scratch.
Work through this sequence:
- Turn Bluetooth off and on again on the device
- Forget the robot in the device's Bluetooth settings
- Restart the robot
- Pair again from the app or programming environment
- Test with a second device if the first still fails
Pairing, Disconnection and Device Checks
Distance matters more than people expect. Keep the robot within a metre of the device during pairing.
Check these common causes of disconnection:
- Another robot already paired and broadcasting
- Too many devices in the room competing for connections
- A tablet with Bluetooth switched off in settings
- Low battery reducing signal strength
If one device fails and another works, the problem is the device, not the robot. Restart the device and clear its pairing list.
Step 3: When a Robotics Motor Is Not Working
A robotics motor not working is one of the easiest faults to diagnose. If the robot powers on and connects but won't move, the problem sits in the motor, its connection, or the code driving it.
Test in this order:
- Run a simple forward command to rule out code
- Check the motor is plugged into the correct port
- Swap the motor to a different port to test the port itself
- Listen for a hum: a humming motor is stuck, a silent one has no power
A reversed motor is a common and harmless fault. If the robot spins instead of driving straight, swap the motor's connection or flip the direction in your code.
If a motor has failed outright, spare parts save the lesson. The Edison spare parts kit for V1 and V2 robots includes wheels, tyres, skids and a battery door, so you can repair rather than replace. It is for V1 and V2 robots only; the V3 needs different spares.

Step 4: Robotics Sensor Troubleshooting for Inconsistent Readings
Robotics sensor troubleshooting starts with the environment, not the sensor. Inconsistent readings usually come from light, distance or surface conditions, not a faulty component.
Edison Spare Parts Kit — V1 & V2 Robots →
Try these fixes first:
- Test the sensor in steady, even lighting
- Move reflective surfaces away from the sensor
- Check the sensor is mounted firmly and facing the right way
- Clean the sensor face with a dry cloth
- Run the same test three times to confirm the fault is repeatable
If readings stay wrong after these checks, swap the sensor with a known-good one. That tells you in seconds whether the sensor or the port is at fault.
Step 5: Check Wiring and Component Connections
Loose wiring causes more faults than any other single issue. Before you replace anything, check every connection by hand. The goal is not just to find the loose plug but to prove which cable, port or component is at fault so you fix it once.
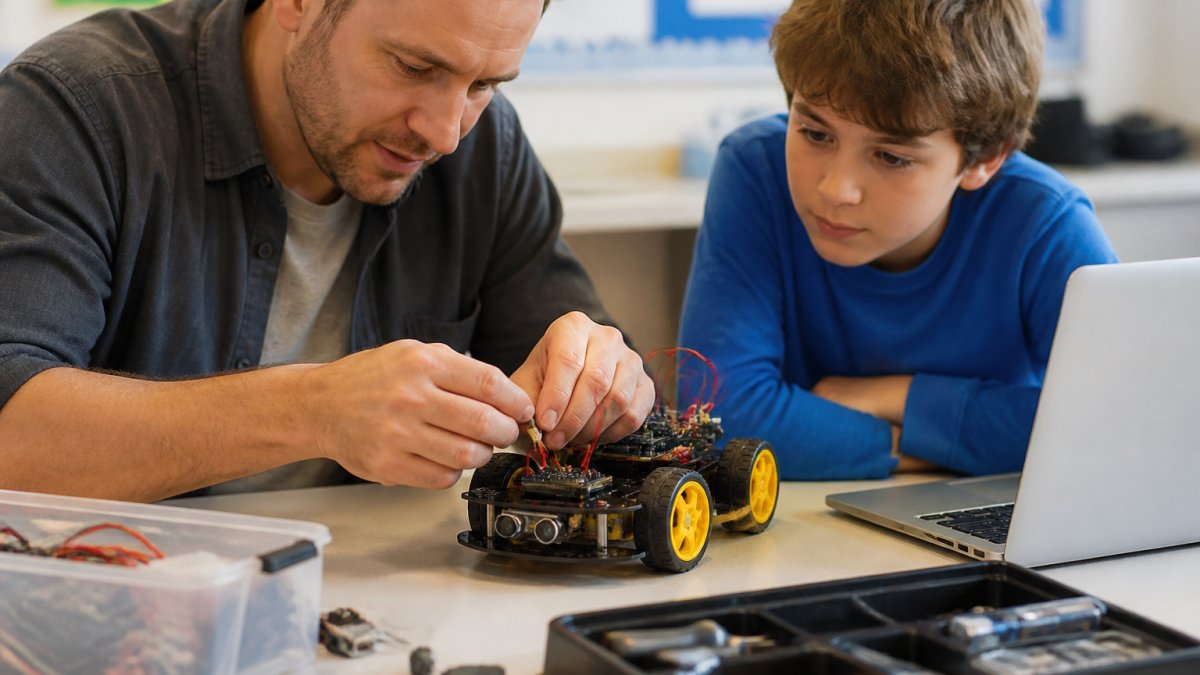
Run this check in order:
- Push each plug firmly into its port and listen for the click where the connector has one
- Look for bent pins, frayed cables and crushed insulation
- Trace each cable from component to controller and confirm it matches the port map
- Swap a suspect cable for a known-good one
- Check colour-coded wires match their ports
Isolating a Wiring Fault
A wiring fault is rarely the whole harness. Isolate it with three swaps:
- Swap the cable, if the fault moves with the cable, replace the cable.
- Swap the port, if the fault stays with the port, the port or controller is at fault.
- Swap the component, if the fault follows the component, the component is at fault.
Whichever swap makes the fault move tells you what to replace. If the fault stays put through all three swaps, the problem is upstream in the controller or the code, not the wiring.
Keep a simple port map taped inside each kit lid. Students reseat plugs quickly, and a labelled map stops the most common error: a plug pushed into the adjacent port because two ports look identical.
Solderless, classroom-ready electronics make this far easier, because students can reseat a plug without tools. Keep spare cables on hand. Extension cables like the Hummingbird 4-wire extension cable are worth having in the cupboard for larger builds.

Cable Care and Storage
Most wiring faults are caused by how cables are stored, not how they are used. Coil cables loosely rather than wrapping them tightly around a finger, keep plugs out of the bottom of a tray where they get crushed, and store each kit with its cables attached to their components where the design allows. Label both ends of any cable you add to a kit so the next teacher can trace it without guesswork.
Watch out: forcing a plug into the wrong port bends pins and turns a two-minute fix into a replacement job. Power the robot down before reseating any plug, and never pull a cable by the wire, pull the plug body.
Step 6: Your Robotics Hardware Maintenance Checklist
A robotics hardware maintenance checklist prevents most mid-lesson failures. Run it at the end of each term, and again before any big project.
- Charge every battery and test each one holds charge
- Check all cables for fraying or bent pins
- Clean sensor faces with a dry cloth
- Test every motor in both directions
- Confirm each robot pairs with your devices
- Count components against the kit list
- Store robots and parts in labelled trays
- Record any faults in a shared log
The fault log is the step most schools skip when they troubleshoot classroom robotics. It turns a recurring problem into a pattern you can fix once.
Run through this checklist at the end of each term and before any big project.
Check |
What to do |
|---|---|
Batteries |
Charge every battery and test each one holds charge |
Cables |
Check all cables for fraying or bent pins |
Sensors |
Clean sensor faces with a dry cloth |
Motors |
Test every motor in both directions |
Pairing |
Confirm each robot pairs with your devices |
Components |
Count components against the kit list |
Storage |
Store robots and parts in labelled trays |
Fault log |
Record any faults in a shared log |
Step 7: Safety Procedures and Running a Mid-Lesson Recovery
Safety comes before speed. Before any troubleshooting, switch the robot off, disconnect the power supply, and keep small parts away from younger students.
Follow these safety rules:
- Power down before checking wiring
- Never force a connector
- Keep batteries away from heat
- Supervise younger students closely with small parts
- Use the emergency stop or power switch if a robot behaves unpredictably
When a robot fails mid-lesson, have a recovery plan ready. Pair students so one robot serves two groups. Hand the faulty unit to a support student for diagnosis. Keep a spare kit charged and ready.
That keeps student practice time intact and stops one fault from derailing the whole class.
Frequently Asked Questions
Why is my classroom robot not turning on?
Work through power first. Check the battery is charged and seated correctly, inspect the battery door springs and contacts for corrosion, and test the charger on a known working robot. On kits with a fuse, check it is intact. If the robot still will not power on after a fresh charge and a different cable, treat it as a hardware fault and set it aside for repair rather than troubleshooting mid-lesson.
How can I tell whether a robotics problem is caused by hardware or software?
Run the same program on a second robot. If it works on the second unit, the fault is with the first robot's hardware. If it fails on both, the problem is in the program code or the uploading process. You can also test a single output, such as one motor or LED, with a simple known-good program. This isolates whether the component responds at all.
What should teachers do when a robotics kit stops working during a lesson?
Swap in a spare robot and keep the class moving, then diagnose the faulty unit afterwards. During the lesson, run only the fast checks: power, cable, pairing and connection. Anything deeper, such as sensor configuration or wiring inspection, belongs in a quiet moment. Keeping one spare per five robots and a small spares kit means a single failure never stalls a whole class.
How can schools prevent common problems with classroom robotics hardware?
Use a robotics hardware maintenance checklist at the end of every unit: charge and store batteries, inspect cables and connectors, count components back into the kit, and log any faults. Store kits in a dry cupboard away from heat, and pair a multi-robot charger with each class set so batteries are never flat at the start of a lesson. Regular checks catch most faults before students meet them.
A dead robot in the middle of a lesson is stressful, but it is rarely mysterious. A fixed sequence, a termly checklist and a few spare parts turn most faults into a two-minute fix.
Sammat supplies classroom-ready robotics kits and spares, curated by former teachers, with a teacher-run support team and fast local shipping. Purchase orders are welcome, and help is a call away when something breaks mid-lesson.
Get started with Sammat and keep your classroom robots running all year.
